Last night, I decided to marinate chicken breasts in the leftover buttermilk that I had. I woke up today thinking about what to do with it and then I remember this Buttermilk Chicken Burger that I have tried from Soul Shack along Dixon St. It was so amazing! So, I decided to make my own version from scratch. I made my own version of the fried buttermilk chicken burger (which I am going to write about on another post), other ingredients and the brioche bun!
I ended up looking at recipes for the brioche bun and found one that uses this technique called Tangzhong. Tangzhong is a Japanese technique wherein flour and water (in this case, milk) is mixed on low heat in order to form a paste. It is then incorporated into the rest of the dough ingredients. This gelatinised Tangzhong mix apparently allows the dough to hold more water, resulting in a softer and fluffier bread, which also has a longer shelf life, compared to the traditional ways of just mixing ingredients as is.
 |
| Before proofing |
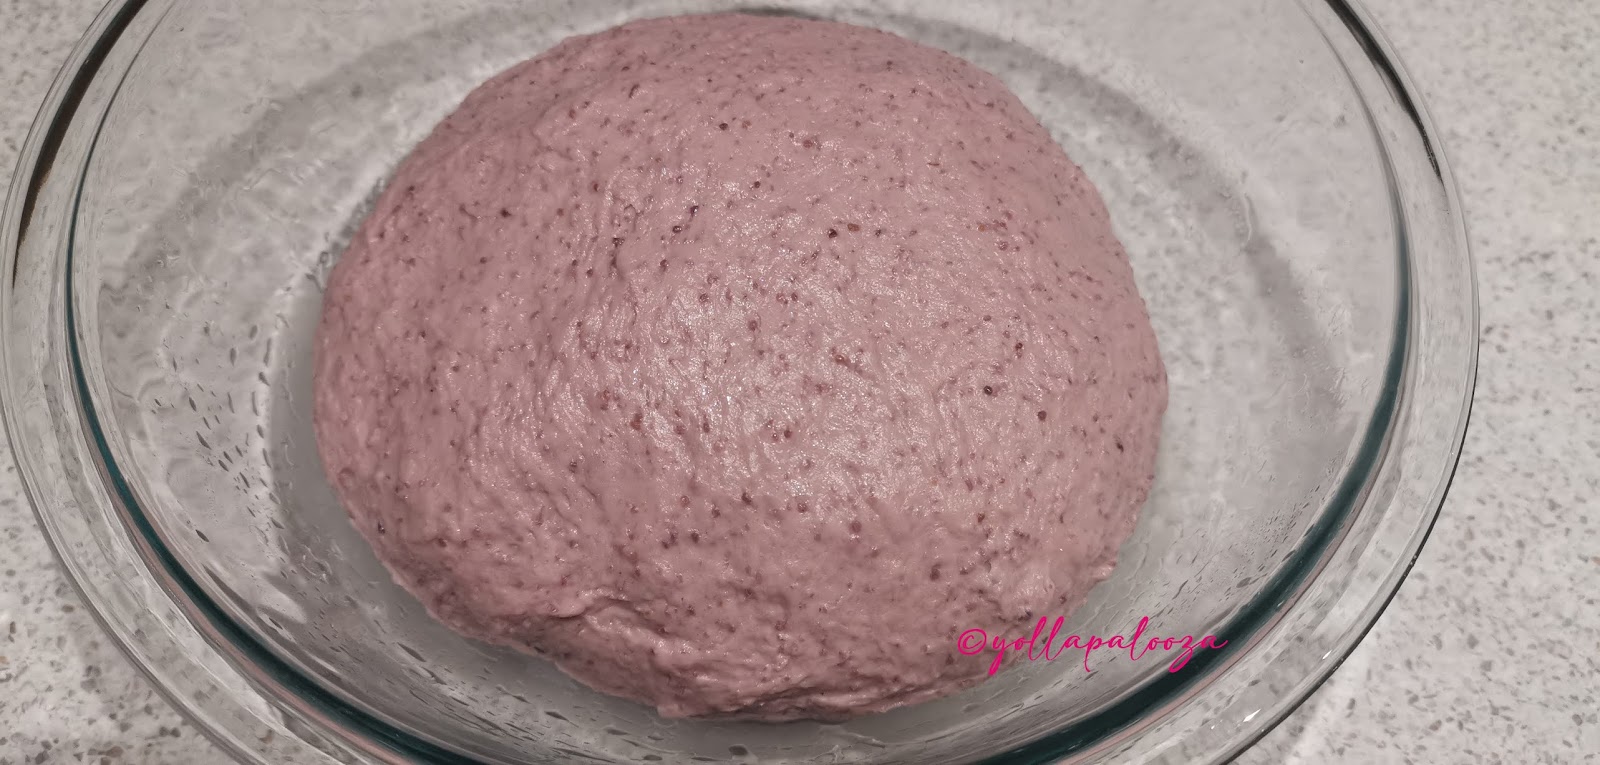
 |
| After first proof |
 |
| Pulled the sides inwards and pinched |
 |
| Rolled doughs ready for 2nd proofing |
 |
| After the 2nd proofing |
 |
| Baked Brioche Buns 😆 |
SOFT AND FLUFFY BRIOCHE BUNS (USING TANGZHONG TECHNIQUE)
Makes 7 brioche buns (around 80-100g per dough roll)
INGREDIENTS:
Tangzhong Mix:
- 60 g milk
- 27 g water
- 20 g bread flour
- 120 g milk
- 9 g active yeast
- 320 g bread flour
- 35 g sugar
- 7 g fine salt
- 1 pc egg
- 1 pc egg yolk
- 42 g butter, softened
Egg wash:
PROCEDURE:
- Warm the 120g milk to around 35c. Add the yeast. Set aside and allow yeast to proof.
- Make the Tangzhong: Mix the 60 g milk, 27 g water and 20 g flour in a saucepan and put on low heat. Mix until it looks like a paste. This takes only takes a minute or less. Set aside.
- In the mixer's bowl, mix the remaining flour, sugar and salt. Stir to incorporate.
- When the yeast has already proved (when it looks bubbly and a foam has already formed on the top part), mix the milk and yeast mixture to the dry ingredients. Mix a little using the dough hook attachment.
- Add the egg and egg yolk. Continue mixing until everything has been mixed thoroughly.
- Add the softened butter little by little. Knead until fully incorporated.
- Take the dough mixture out of the bowl and put on a lightly floured surface.
- Knead the dough a little bit more. Do the windowpane test to ensure that the dough has been properly kneaded. The windowpane test is done by getting a bit of the dough and stretching it. The dough should be able to stretch without breaking in the middle. The middle becomes super thin that light could pass through it, just like a glass window. 😉
- Grease another bowl with oil or butter. I used oil for this recipe.
- Put the dough in the bowl and allow to proof at room temperature (around 25c) until it becomes double in size.
- Once the dough has proved, take it out of the bowl and put on a lightly floured surface.
- Cut the dough according to your desired weight. For this recipe, I cut them into 90-100g portions.
- Take each dough portion and pull the sides inwards. Pinch them on the center so that they hold stick together. Do this a couple of times.
- Make sure that the pinched portion is on the bottom part. Roll each dough by swirling the dough under your cupped until it forms into a nice smooth ball.
- Line a baking sheet with a baking paper or use a non-stick baking sheet. Arrange the rolls on it so that there is about 2 inches space in between each roll.
- Allow this to proof again until the rolls increase in size.
- Make the egg wash by combining egg and milk. Strain to ensure smoothness.
- Brush the tops of the buns with egg wash. Be careful not to put too much. We don't want to fry eggs on the bottom.
- Bake for around 15 minutes at 180c. I suggest keeping an eye on this once it reaches 13 minutes. Mine turned out a little bit more brown than I intended it to be, but it wasn't burnt.
- Once done, take off the oven and transfer each bun unto a cooling rack to ensure that the bread stops cooking.
- Allow to cool down and enjoy!
NOTES:
- The Tangzhong technique definitely works wonders! This is my second time making brioche bread and this one definitely turned out softer and fluffier.
- If you live in a cold country like New Zealand, proofing might be a bit hard. I bought the Brod and Taylor foldable proofer after my first few failed attempts at proofing. 😅 I will probably post a review about it at one point, to rave about it. Hehe! You may also try proofing in an oven. Just heat the oven up to around 25-30c. Put a boiling water on the bottom. At least, this is what other people do. It didn't work for me when I tried it. I think either I was too lazy to watch the temperature or it is just too damn cold in here!
- Always do the windowpane test when making bread. I would say that it is a must!
- Don't be afraid if the dough feels a bit sticky. They will turn out great!
- I suggest that you weigh your dough before cutting and then divide them according to how many buns you want to make. This is to ensure that you have the same weight for each dough. I did not mind having a mini bun, so I just decided to weigh 100 g portions and just roll the remaining dough into a tiny ball.
- It is better to strain the egg wash to achieve a smoother consistency. This is so that no chunks of egg white falls on the bread.
- The timing of the baking would depend on how big or small your buns are. Always keep watch. Take it out when you have reached the desired color. Just make sure that it isn't undercooked or overcooked. I usually take breads out a minute or two before what a recipe tells me, since they continue to cook for a few minutes once you have taken them out of the oven.